
Moving photos from an Android phone to a Windows PC is useful when you want to create an extra copy of your pictures, free up phone storage, edit images on a larger screen, or keep important files somewhere other than your phone.
There are several ways to transfer photos, but a USB cable is often the most straightforward because it does not require uploading the entire photo library to a cloud service. Windows can also import photos using the Microsoft Photos app, while Android provides a USB file-transfer option that lets you browse and copy folders directly. (Google Android Help )
The example in this guide uses a Samsung Galaxy connected to a Windows PC. The exact wording of some options can vary depending on the Android version, One UI version, and computer configuration.
Before You Start
You need three things:
- An Android phone
- A Windows PC
- A USB cable capable of transferring data
This last point is important because not every USB cable supports file transfer. Some cables are designed primarily for charging. Google specifically recommends trying another cable if your computer does not recognize the phone for file transfer.
It is also a good idea to unlock your phone before connecting it.
Windows may not be able to access the device while it is locked. Microsoft specifically instructs users to unlock the Android phone before attempting to import photos.
Step 1: Connect the Android Phone to Your PC
Connect your Android phone to the Windows computer using the USB cable.
Keep the phone unlocked after connecting it.
A notification related to the USB connection should appear on the phone. On Android, this may say something similar to “Charging this device via USB”.
Tap the notification to see the available USB options.
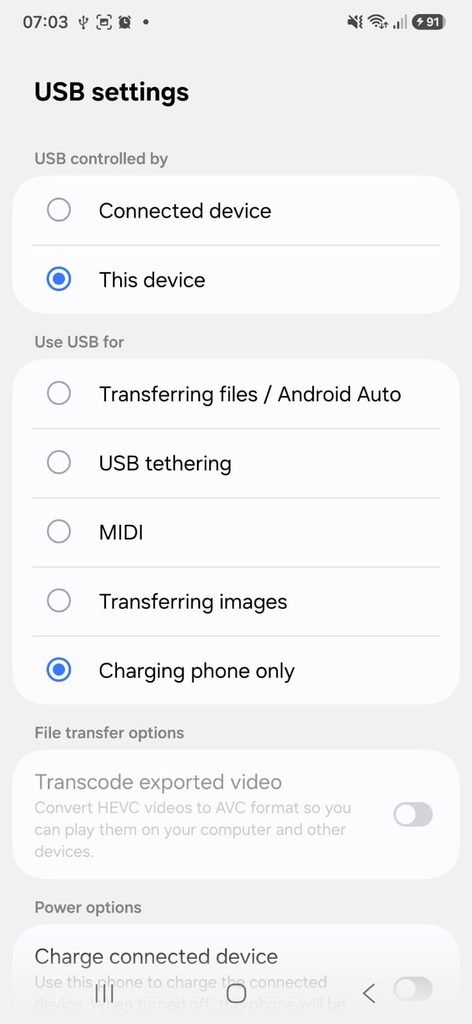
Android USB connection notification showing the available USB connection options.
Step 2: Select File Transfer
After opening the USB settings, look for an option such as:
File Transfer
or
Transferring files
Select the file-transfer option instead of leaving the phone in charging-only mode.
Google’s official instructions use the following process: connect the unlocked Android device, tap the USB charging notification, and under Use USB for, select File Transfer.
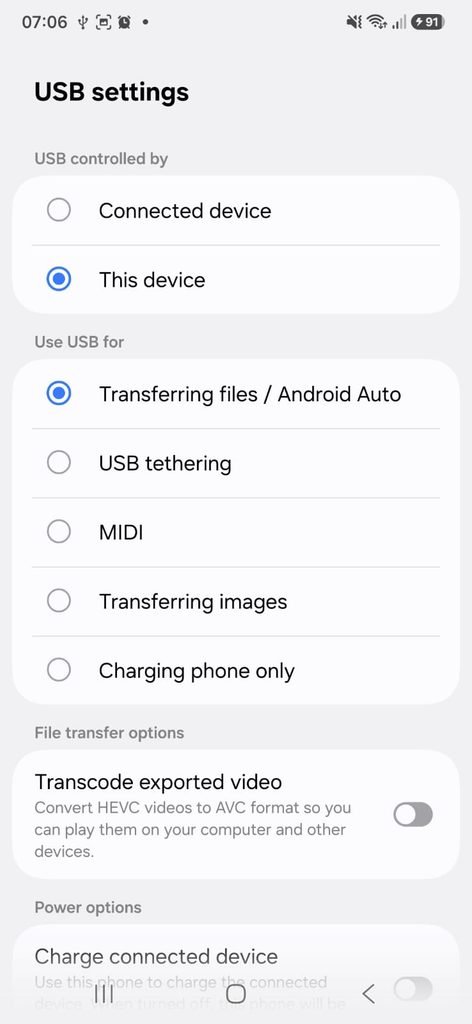
Android USB settings showing File Transfer selected for a connection to a Windows PC.
Once this option is enabled, Windows should be able to access the phone’s available files.
Step 3: Open the Phone on Windows
On your Windows PC, open File Explorer.
Look under This PC for your connected Android phone.
The device may appear with the phone’s model name or manufacturer name.
Open the device and look for its internal storage.
The exact folder structure can vary, but photos taken with the phone’s camera are commonly stored inside a folder such as:
DCIM → Camera
Other images may be stored elsewhere depending on how they were created or downloaded.
Step 4: Find Your Photos
Open the folders where your photos are stored.
For camera photos, start with:
DCIM → Camera
You may also encounter images in folders related to:
- Screenshots
- Downloads
- Messaging applications
- Edited images
- Social media applications
Do not assume that every image on your phone is inside the Camera folder.
If you are trying to create a complete backup, check the other folders that contain photos you consider important.
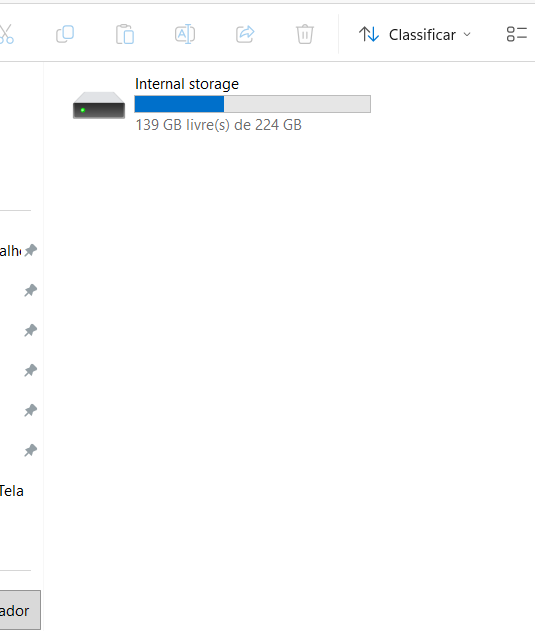
Windows File Explorer showing the photo folders available on a connected Android phone.
Step 5: Select the Photos You Want to Transfer
You can copy individual photos, multiple files, entire folders, or larger groups of images.
For a few files, selecting individual photos may be the easiest approach.
For a large camera library, copying the entire Camera folder can save time.
Before starting a large transfer, consider where you want to store the files on your PC.
For example, you could create a folder such as:
Pictures → Android Phone Backup
Using a dedicated folder makes it easier to identify the files later.
Step 6: Copy the Photos to Your Computer
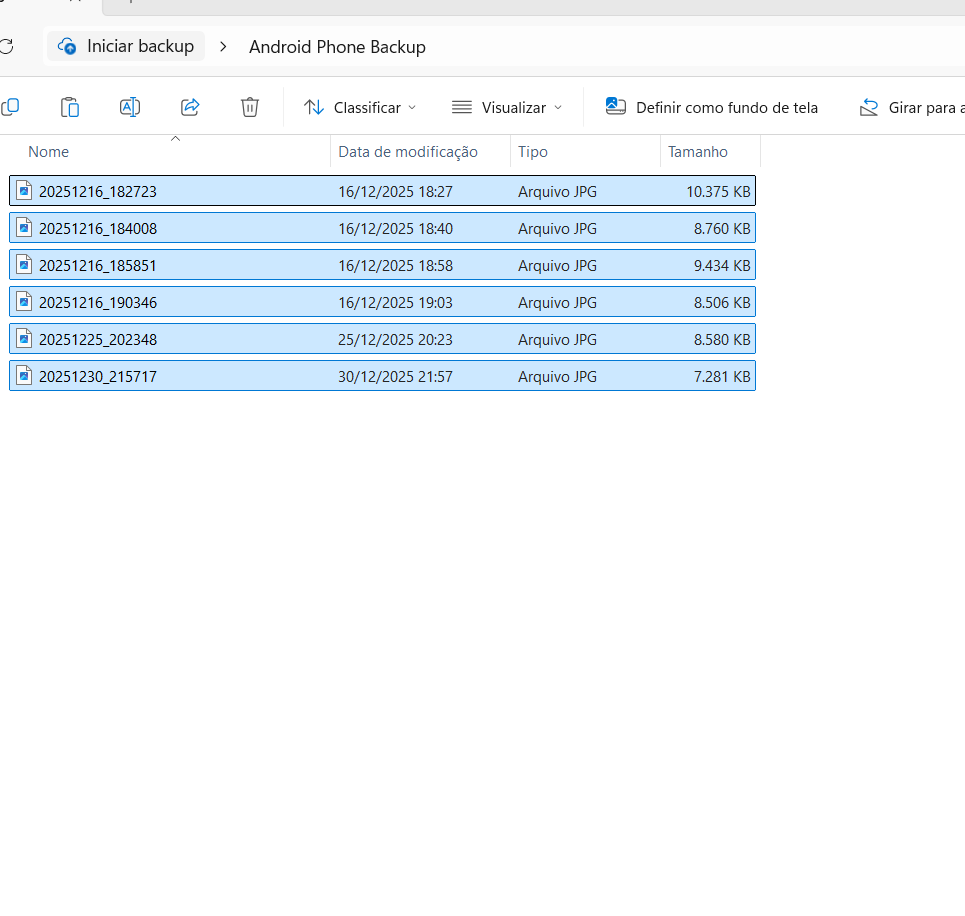
After selecting the photos, right-click and choose Copy.
Then navigate to the folder you created on your computer and choose Paste.
You can also drag the selected files from the phone’s storage window into a folder on your PC.
Google’s Android documentation specifically states that once File Transfer is selected, a file-transfer window can be used to drag files between the Android device and the computer.
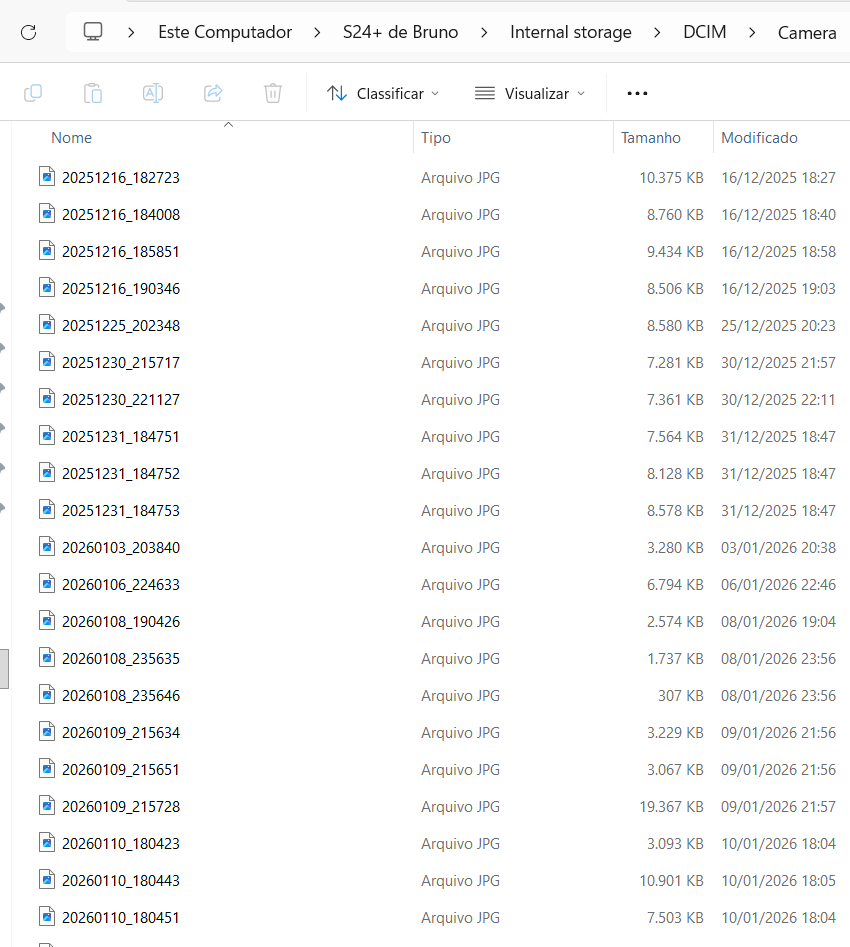
Windows File Explorer showing photos being copied from an Android phone to a folder on the computer.
The amount of time required depends on the number and size of the files.
A folder containing a few photographs may transfer almost immediately, while several gigabytes of high-resolution photos and videos can take considerably longer.
Step 7: Verify the Transfer
Do not immediately delete the original photos from your phone after the transfer finishes.
First, open the destination folder on your computer.
Check several files from different parts of the transfer.
For example, open:
- A recent photo
- An older photo
- A large image
- A photo from a different folder
If you transferred videos, open at least one video as well.
This confirms that the files were copied correctly and can be opened normally on the computer.
Verification is particularly important if you are using the transfer as a backup.
Step 8: Import Photos With the Windows Photos App
Windows also provides another method for importing photos from Android.
Microsoft’s current instructions for Windows 10 and Windows 11 explain that you can connect an Android phone using a USB cable, unlock it, open the Photos app, select Import, choose the connected device, and then follow the instructions to select which items to import and where to save them.
This can be convenient when you want Windows to help organize the import instead of manually browsing folders.
The process is:
Connect phone → unlock phone → open Photos → Import → select connected device → choose items → choose destination
Microsoft Photos showing the Import option for a connected Android phone.
The Photos app can be useful when your main goal is importing camera pictures into your computer’s photo library.
Step 9: Keep the Original Photos Until You Finish Checking
If your objective is to free up storage on the phone, wait until you have verified the transferred files.
It is better to keep the original photos until you know the copies on the PC are intact.
This is particularly important for valuable personal photos that may not exist anywhere else.
Only after checking the destination folder should you consider removing the original files from the phone.
What If Windows Does Not Detect the Android Phone?
There are several possible reasons.
Start with the simplest checks.
Make sure the phone is unlocked
A locked Android phone may not be accessible to the computer. Microsoft specifically tells users to unlock the phone before attempting to locate or import files.
Check the USB mode
Make sure the USB connection is set to File Transfer rather than charging only.
Try another USB cable
Not all USB cables can transfer data.
Google specifically recommends trying a different cable if file transfer does not work.
Try another USB port
A different port on the computer can help determine whether the original port is causing the problem.
Restart the devices
Google recommends restarting the Android device and computer as part of USB file-transfer troubleshooting.
What If the USB Cable Only Charges the Phone?
This is a common source of confusion.
A phone can show that it is charging even when the cable cannot transfer files.
Check the USB notification on the phone and look for an option related to File Transfer.
If the option is unavailable or does not work, try another cable that supports data transfer. Google explicitly notes that some USB cables cannot be used for file transfer.
How to Transfer Only Photos Instead of Everything
You do not need to copy every folder from the phone.
If your goal is simply to back up camera pictures, you can open:
DCIM → Camera
and copy the photos from there.
If you also want screenshots, downloads, or images received through messaging applications, you may need to inspect additional folders.
This selective approach can make the process faster and prevent unnecessary files from being copied.
Can You Transfer Photos Without a USB Cable?
Yes.
Android also supports moving files through a Google Account, and Google provides Quick Share for Windows for transferring images, videos, and documents between nearby Android and Windows devices.
Quick Share can be useful when you only want to send a smaller number of files and do not want to connect a cable.
For large photo libraries, however, a direct USB transfer may be more practical because you can move entire folders.
Transfer Photos With Quick Share
If you prefer a wireless option, install or use Quick Share for Windows and make sure the phone and PC meet the requirements.
Google states that Quick Share can send images, videos, and documents between Android devices and compatible Windows PCs.
The general process is:
- Open Quick Share on Windows.
- Make the appropriate device visible.
- Select the file or files on your Android phone.
- Choose Quick Share.
- Select the Windows computer.
- Accept the transfer when prompted.
Quick Share transfers can also use encryption, according to Google’s documentation.
Which Method Should You Use?
The best method depends on how many files you need to move.
USB cable: Best for large transfers and entire folders.
Windows Photos: Convenient for importing photos into the Windows photo library.
Quick Share: Useful for wireless transfer of selected files.
Cloud storage: Convenient when you want the files available across several devices.
For a large collection of photos, USB is often the simplest option because you can browse the phone’s folders and copy exactly what you need.
How to Organize Your Photos After Transferring Them
A transfer is a good opportunity to organize your photo collection.
Instead of putting everything into one folder, consider using folders by:
Year
Event
Trip
Family
Projects
For example:
Pictures → 2026 → Family
Pictures → 2026 → Vacation
This makes future backups much easier.
You can also rename folders without changing the original files stored on the phone.
Should You Delete Photos From the Phone After Transferring Them?
Only after verifying the copy.
If the files are important, open several of them on the computer before deleting anything from the phone.
For particularly important memories, consider keeping another backup in addition to the computer.
A computer copy is helpful, but a single copy is still vulnerable to hardware failure, accidental deletion, theft, or other problems.
What About Photos Already Backed Up to Google Photos?
If your photos are already backed up to Google Photos, you have another copy available through your Google Account.
However, a local transfer to your computer can still be useful when you want a personal offline archive or when you need direct access to original files on the computer.
Google lists both Google Account-based transfers and USB transfer as ways to move photos and other files between Android and a computer.
Frequently Asked Questions
Can I transfer Android photos to Windows without installing an app?
Yes. You can use a USB cable and Android’s built-in File Transfer option. Windows can then access the phone through File Explorer.
Why does my computer only charge my Android phone?
The USB connection may be set to charging only, or the cable may not support data transfer. Check the USB notification and select File Transfer, then try another cable if necessary.
Where are camera photos stored on Android?
On many Android phones, camera photos are stored under DCIM → Camera, although the exact folder structure can vary.
Can I transfer thousands of photos at once?
Yes. You can copy an entire folder containing many photos. The time required depends on the total amount of data and the USB connection.
Is it better to copy or move photos?
Copying is safer when creating a backup because the originals remain on the phone until you verify that the computer copy is working correctly.
Can I use Quick Share between Android and Windows?
Yes. Google supports Quick Share for transferring images, videos, and documents between compatible Android devices and Windows PCs.
Why can’t I find my photos after connecting the phone?
First check that the phone is unlocked and that USB is set to File Transfer. Then open the device in File Explorer and inspect the DCIM, Pictures, Download, and other relevant folders.
A Simple Way to Keep Your Android Photos Safe
Transferring photos from Android to a Windows PC does not have to be complicated.
For a large library, connect the phone with a data-capable USB cable, unlock it, select File Transfer, open the phone in Windows File Explorer, and copy the folders containing your photos.
After the transfer, take a few minutes to verify the files on the computer before deleting anything from the phone.
That final check is one of the most important steps in the process. A successful transfer is not just about moving files from one device to another; it is about making sure your photos are still accessible when you need them.